
My blogger friend, Cindy, over at Little Miss Celebration, always has the coolest things on her blog! Last week she shared her Groovy Candy Coated Oreos and I fell in love with her beautiful pictures as I took a step back in time and remembered when we used to say groovy and far out, man!
I immediately ordered the molds from Amazon. I got caught up in looking at all the varieties of candy molds and I finally had to just stop before I became a hoarder.
I knew the oreos would be a hit because everything Cindy makes is a hit. What I didn’t know is if I would be able to make them. You may or may not know that I don’t have a whole lot of patience.
I’ve used Candiquik for years, so that part was a no-brainer. But the painting was kinda time consuming since I had never done such intricate painting with chocolate. (I’m more of a painter of big spaces, like walls.)
If I had been able to find the paint brushes that I bought, it would have been much easier, but I only had one small paint brush and had to keep cleaning it between the colors.
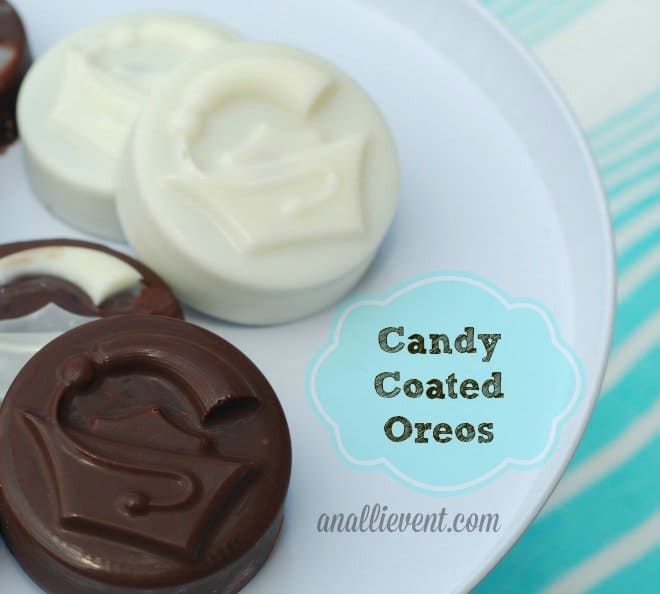
Finally, I just stopped with the intricate painting and just filled the molds 2/3’s full of Candiquik, popped in the oreo, smashed it down, placed it in the fridge for 30 minutes to harden, popped them out of the molds and they were pretty enough.
You can buy the molds for any occasion! And once you get the hang of it, it goes pretty smoothly.
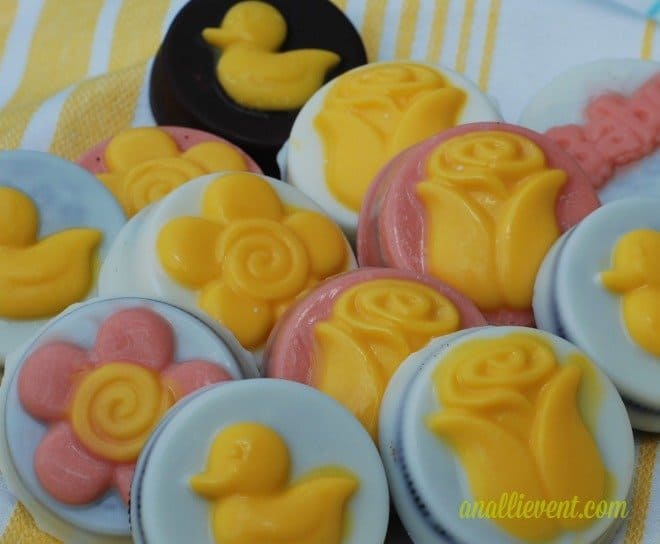
My favorite candy molds were the little ducks – perfect for a baby shower!
Was mine as pretty as Cindy’s? No! Were they a hit? Yes, they were! Just ask my grandchildren AND my grown up children!
I do believe that practice makes perfect. I’ll keep on practicing! And I’ll keep on buying the molds because I have found a new hobby. And I’m gonna find that pack of paint brushes I’ve hidden from myself!
You can find Cindy’s Candy Coated Oreos and all the details here! And while you’re there, check out some of her other recipes and projects! She’s really got it going on!
What new projects/recipes have you tried this week?
Peace out! Catch you on the flip side! Be there or be square! (70’s Lingo)
27 comments
Alli – I am SO excited that you made these and I think they look absolutely perfect!!! You really hit a home run with your first try – are you sure you haven’t done this before? 😉 I just know your family loved them because I know mine does! I totally love the little ducks and I have a baby shower coming up, so a new mold is in my immediate future. Thank you so much for your sweet and kind words, you totally made my day. So now we have to make plans to get together and make candy, my friend! Have a super groovy day, my friend. Hugs!
Cindy, I bought the bride and groom molds, too. I thought they would be perfect for a bridal shower or bridesmaid luncheon, etc. You totally rock!
Oh, I love the idea of these for a party! The ducks are adorable! I even like the ones that are not painted! I’m pinning
Thanks, Paris! My impatience kicked in and I just left the last batch unpainted. I also bought some bride and groom molds, perfect for a bridal shower.
Hmm, I have a book party this weekend, and these are pretty tempting to make. I might have to keep these in mind for the next function.
They are super easy!
This is absolutely precious! Thank you for sharing!
Thanks, Shirley! I really enjoyed your story about girls night out!
Wow. This is such an awesome idea! I think I’m going to try it. Do you think you can fill the little spaces with a different color of candy and then the main color? (Sorry, does this make sense? I’m a bit jet lagged right now!)
If you notice the second picture, that’s what I did. The duck and flowers are a different color than the coating on the oreo. The first picture is the one that I said to heck with it and just used one color. (And some of them were eaten before I had a chance to photograph them. 🙂
I think they’re gorgeous!!! You did a fantastic job!
Thanks, Kristen! I kinda enjoyed it after I got the hang of it.
These look amazing! And easy! I love easy 🙂
Me, too! The painting was a little tricky, but not bad.
Looks like fun to me! I like them both painted and unpainted! I would have quit painting also if I were making a lot of them. Already Pinned to my Cookies & Candy board! Those are super cute and a sure hit for an special occasion! My grandchildren would love them too!
Thanks, Shirley! I can’t imagine making dozens and dozens. But it was fun. I made the entire package of Oreos – 30 something, I guess.
Those are so cute! I love them! My husband would be in Heaven- but my teeth would be dying!
How fun, not just sweets but even shaped beautifully!
These look delicious and beautiful.
Angel
these are the cutest and so simple!
These look so wonderful – I agree, the little duckies would be perfect for a baby shower. Could I have some coated oreos??????????
These look great! I think you did a fantastic job 🙂
Thanks, Erica!
I have trying to make these the hard way for so long. I am glad Cindy shared this! Pinned 🙂
Me, too, Meegan! I didn’t know how easy they could be. Thanks for pinning!
Thanks for this post! I actually bought some of these molds at a local craft store but they don’t carry them anymore. I hadn’t even thought to look on Amazon. Wondering how you get the chocolate to not flow over the top of the mold? I have such a hard time getting the cookies to be round and flat on the bottom. Thanks – found you through the Be.YOU.Tiful link party.
It took a little practice to get the chocolate not to overflow. The directions said to fill them 2/3 full. Then I tapped them gently to make sure all the air bubbles were out, etc. Amazon has a bunch of these molds.