These festive, decoupage DIY Christmas Tree Ornaments are so pretty and inexpensive. It’s my type of craft – cheap, easy, and pretty.
I’ve linked the simple craft supplies you’ll need at the end of this post. You probably have most of them on hand. As an Amazon Affiliate, I earn from qualifying purchases.
I’ll be the first to admit that I cook much better than I craft. Simple things, I can handle, and this one is so easy that anyone can do it.
When it comes to crafting, I especially like to decoupage. Decoupage is simply gluing pretty paper or tissue cutouts to glass, plastic, or wood. It’s a relaxing way to spend an hour or two.

Welcome to Our Annual Festive Christmas Event!
Welcome back to year 6 of our Festive Christmas Event where we team up with a bunch of talented blogging friends to bring you a plethora of creative ways to celebrate your holiday season.
We will be baking some cookie recipes for you, sharing some party games, making some handmade gifts, doing some ornament crafting, and sharing our Christmas movies family fun. There will be breakfast recipes and as always our decorated Christmas Trees which is always a fun tour of homes.
New this year is Gift Guides. We are right there with you shopping from home due to Covid 19 and we understand how hard that can be so we have been busy little Elves doing tons of research to create fabulous Gift Guides to help you with your holiday shopping.
You will find new ideas every Monday and Wednesday between Oct. 19th through Nov. 18th. Scroll all the way down to find all the ideas linked at the end.
Supplies To Make DIY Christmas Tree Ornaments
For your convenience, I’ve added the links to the list of supplies at the end of this post.
- Wooden Christmas Tree Ornaments (or your favorite wooden ornament)
- Sponge Paintbrush or Small Paint Roller
- Mod Podge
- Christmas-Themed Wrapping Paper And/Or Tissue Paper (the better-quality wrapping paper and tissue paper works the best)
- Scissors
Cover your work surface with wax paper or something similar to keep drips contained. Place a wooden Christmas tree ornament on the wrong side of the tissue or wrapping paper. Trace with a pencil.
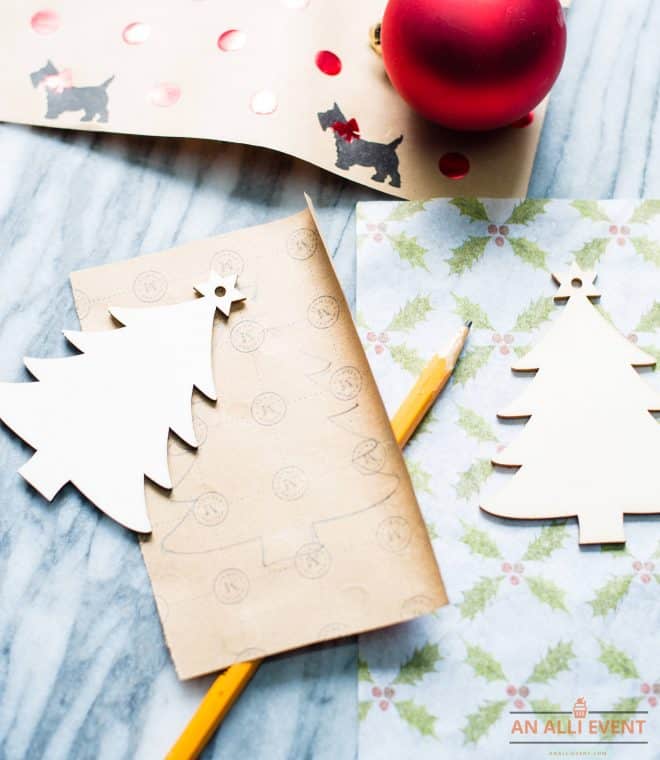
Cut out the tissue paper (or wrapping paper) tree.

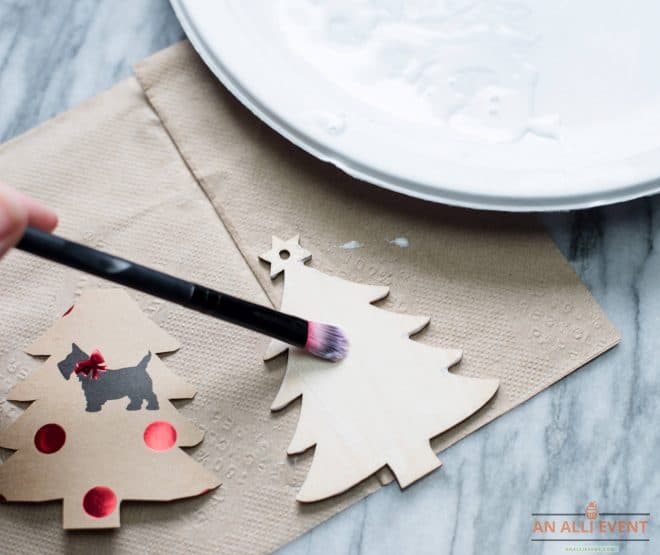
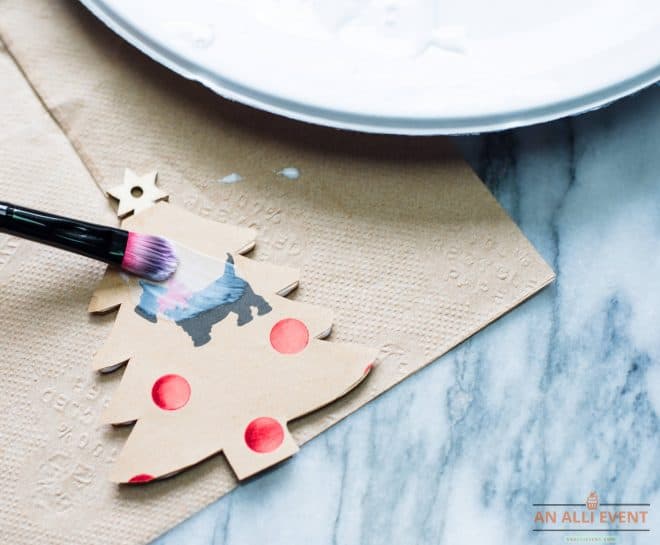
Pour out some mod podge onto a paper plate. Using a sponge paintbrush or roller, cover one side of the tree evenly with the mod podge.
Carefully, place the cut-out tissue paper (or wrapping paper) on top of the tree, gently smoothing out the paper as you go.
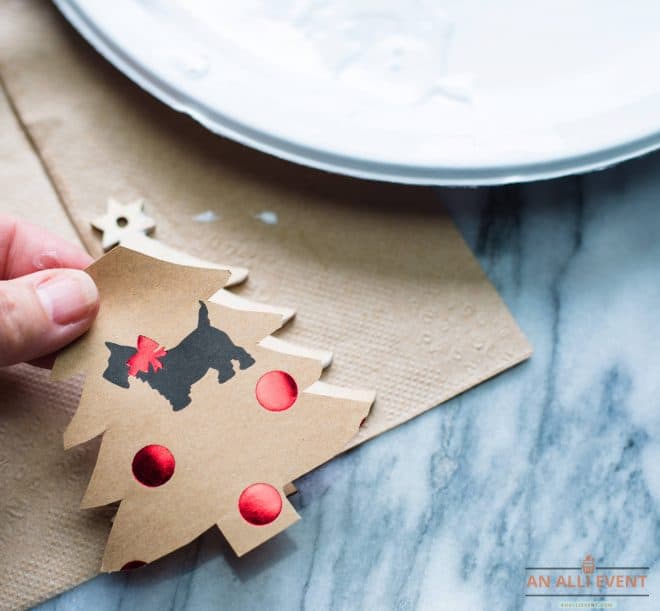
Brush on another layer of Mod Podge on top of the tree. Let dry completely.
I didn’t try to decoupage the area with the hole to hang the ornament. You can leave it natural or paint it green or red.
Also, I only decoupage one side of the ornament. You can certainly do both sides if you’d like.
Can I Use Other Materials For Decoupaging?
Yes! If you don’t have any holiday Christmas tissue paper in your gift-wrapping stash, fear not. There are several other materials you can use.
After I used tissue paper to make several festive Christmas ornaments, I was like a madwoman, hunting down other materials I could use.
I found some scraps of wrapping paper leftover from last year. You know those ends that you keep in case you need to wrap a very small package and you never do?
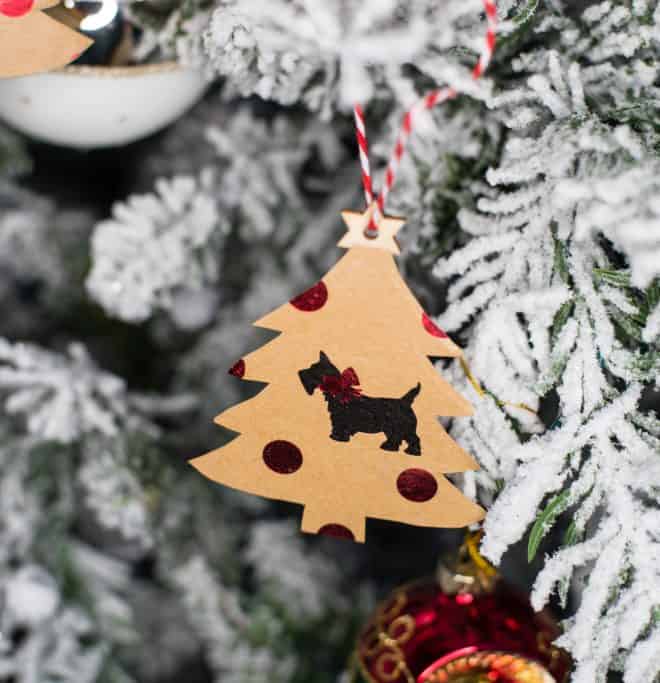
It was my favorite wrapping paper so I decided to make a few trees using that paper. They are adorable.
I try to always buy the thicker wrapping paper and I have to say that I enjoyed using the wrapping paper more than the tissue paper. The wrapping paper I used for this project was leftover from last Christmas. I think I purchased it at T.J. Maxx. Hobby Lobby and T.J. Maxx always have the best wrapping paper.
The ornament below is made using wrapping paper!
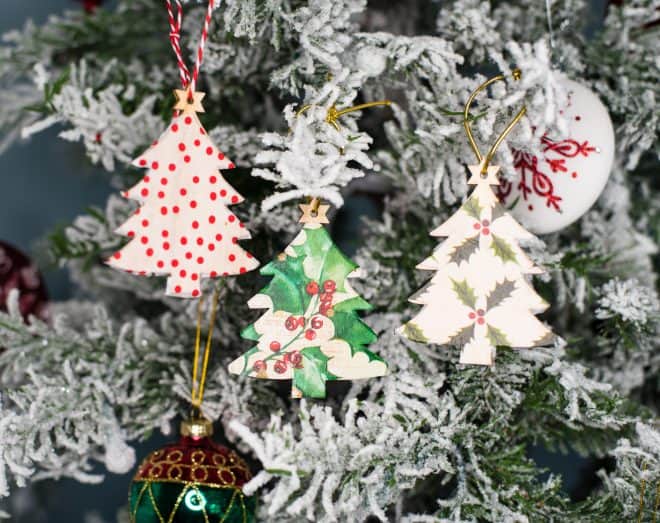
I used tissue paper to decoupage the Christmas tree ornaments below!
Other Materials You Can Use To Decoupage the Christmas Tree Ornaments
- Festive paper napkins (Make sure you separate all the layers. You’ll only need the top, pretty layer)
- Wrapping Paper
- Fabric
- Origami paper
- Wallpaper
- Pages from a magazine
- Greeting cards
This is a very inexpensive craft project. The only thing I had to buy was the wooden ornaments. I had everything else on hand.
You can also use cardboard ornaments. Use a Christmas tree cookie cutter to cut ornaments from cardboard. I would probably decoupage both sides if using cardboard.
Optional: You can hang these festive ornaments on the tree or use them to adorn wrapped gifts.
I also think these Christmas tree ornaments are a fun and easy project for kids. I’m definitely going to let the grandkids get in on the action.
You May Also Like These Holiday Ideas!
- 10 Best Last Minute Christmas Gifts
- Snowman Bookmark Craft For Kids
- Rudolf the Red-Nosed Reindeer Tablescape
- Glamping Christmas Party Ideas
- Best Christmas Games For Large Groups
- Best Christmas Games for Groups
- Pajama Christmas Party for Women
- Fishing Themed Christmas Tree
DIY Christmas Tree Ornament
DIY Christmas Tree Ornament is so pretty and easy to make. This inexpensive craft is fun for kids as well.
Materials
- Wooden Christmas Tree Ornaments (or your favorite wooden ornament)
- Mod Podge
- Christmas-Themed Tissue Paper OR Wrapping Paper (the thicker, better tissue paper works best)
Tools
- Sponge Paintbrush or Small Paint Roller
- Scissors
- Paper Plate or Saucer (for Mod Podge)
Instructions
- Cover your work surface with wax paper or something similar to keep drips contained.
- Place a Christmas tree ornament on the wrong side of the tissue paper. Trace with a pencil. Cut out the tissue paper tree pattern.
- Pour some Mod Podge into a paper plate or saucer. Using your sponge paintbrush or roller, cover one side of the tree evenly with the mod podge.
- Carefully, place the cut-out tissue paper on top of the tree, gently smoothing out the paper as you go. Repeat the process on the other trees.
- Brush another layer of Mod Podge on top of the tissue paper covered tree. Let dry completely.
Recommended Products
As an Amazon Associate and member of other affiliate programs, I earn from qualifying purchases.
-
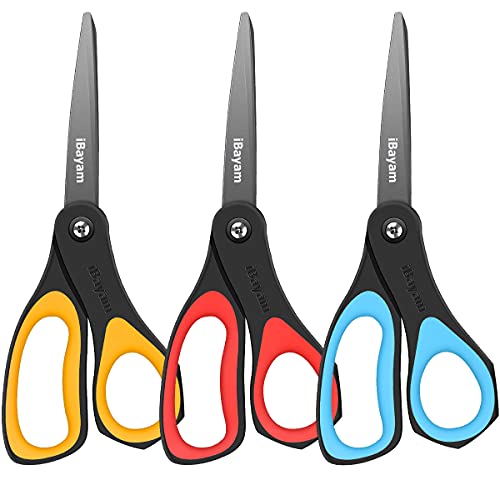 Scissors, iBayam 3 Pack 8" All-Purpose Titanium Non-Stick Scissors, Comfort Grip Sharp Nonstick Scissors for Office School Home General Use Art Craft Classroom DIY Supplies Cutting Tape Adhesive Vinyl
 -
 Bates- Foam Paint Brushes, 16pcs, 2 Inch, Sponge Brushes, Sponge Paint Brush, Foam Brushes, Foam Brushes for Painting, Foam Brushes for Staining, Paint Sponges, Foam Sponge Brush
 -
 Whaline 120 Sheet Christmas Tissue Paper Wrapping Paper Kraft Snowflake Xmas Tree Solid Design for DIY Christmas Winter Decoration, 13.78" x 19.69"
 -
 Hallmark Christmas Reversible Wrapping Paper Bundle, Pets and Patterns (Pack of 3, 120 sq. ft. ttl) Cats, Dogs, Stripes, Polka Dots, Paw La La La
 -
 MELLIEX 40 Pieces Wooden Hanging Ornaments for Christmas Decorations, DIY Unfinished Wood Crafts Cutouts with 40 Twines for Xmas Tree Hanging Ornaments Gift Tag
 -
 Mod Podge CS11302 Waterbase Sealer, Glue and Finish, 16 oz, Matte
Check Out Even More Great Ideas Below!
How to Make Animal Crossing Balloon Present Ornaments My Pinterventures
Easy Painted Wood Slice Ornaments In Bright Colors Intelligent Domestications
DIY Wood Burn Ornaments As For Me and My Homestead
Wood Burned Ornaments The Aspiring Home
Snow Globe Ornaments From Recycled Ice Cream Lids! Little Vintage Cottage
Minion Ornaments Coffee With Us 3
Crystal DIY Christmas Ornaments From House To Home
DIY Pour Painted Christmas Ornaments Blogghetti
DIY Christmas Tree Ornament: Easy Decoupage Craft An Alli Event
Organza DIY Embroidery Hoop Ornaments Interior Frugalista
Disney Holiday Cookie Ornament Craft Simply Inspired Meals
Glittery DIY Candy Ornaments with Your Cricut Craft Rocker
Clothespin Snowflake Ornaments Polka Dot Poplars
Farmhouse DIY Christmas Tree Ornament Pretty DIY Home
Lightweight Bauble Ornament Eye Love Knots
Woodland Ornament DIY Christmas Tree Lane
Simple DIY Leather Christmas Ornaments Domestically Creative
Light Up Christmas Lantern Ornament Purple Hues and Me
DIY Wood Slice Christmas Ornaments Mom Home Guide
Lettered Wood Slice Ornaments Creative Cynchronicity
Swedish Paper Heart Ornament Tikkido
Personalizing Ornaments with a Cricut Domestic Deadline
How To Make One-of-a-Kind Snowman Ornaments My Humble Home and Garden
DIY Wood Slice Ornaments Farm Girl Reformed
How to Make Super Simple and Sparkly Christmas Ornament Our Sutton Place