You all know I hate coding with a purple passion!  I avoid it if at all possible because it seems I always get it wrong and have to keep on trying to make sense of it.
Recently I had to insert an image into my sidebar and I didn’t have a code. Â I tried to follow a tutorial on youtube, but it just never worked. Â Then I found an easy way to add images to my sidebar and I had to share! Â It’s almost too easy! Â You’re gonna love this!
Note: Â I’m going to walk you all the way through the easy steps as if you are a brand new blogger.
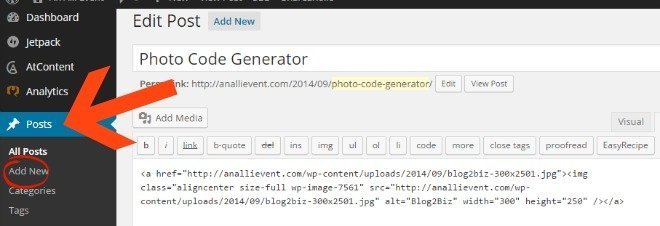
1. Â Forget coding! Â Pretend you are drafting a new post. Â Click add new and give that pretend post a title such as photo code generator. Â (Humor me here)
2.  Click “add media” to upload your image (the one you want in your sidebar) to your post just like you would do if you were adding an image to your real post.
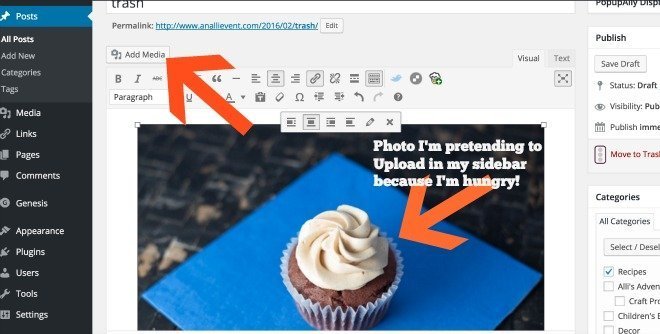
Make sure it fits in your sidebar (usually around 200-300 pixels wide). Â If you forgot to resize it, you can do it in the media editor.
Relax, you’re not going to actually publish this post. Â But keep it around for the next time you need to add images to your sidebar.
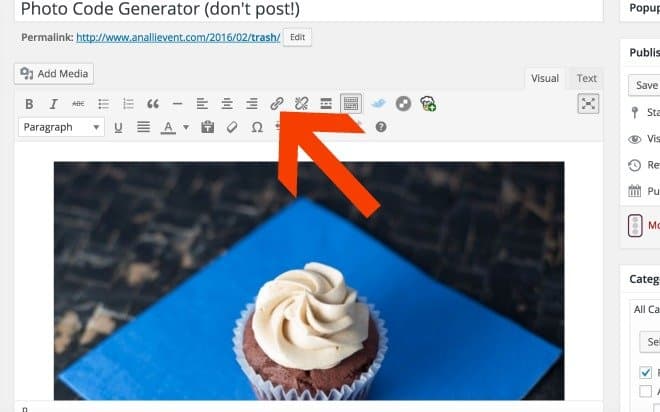
Do you want to make the image clickable?
After you add your image, click the link icon and add the link you want your readers to go to when they click the pic.
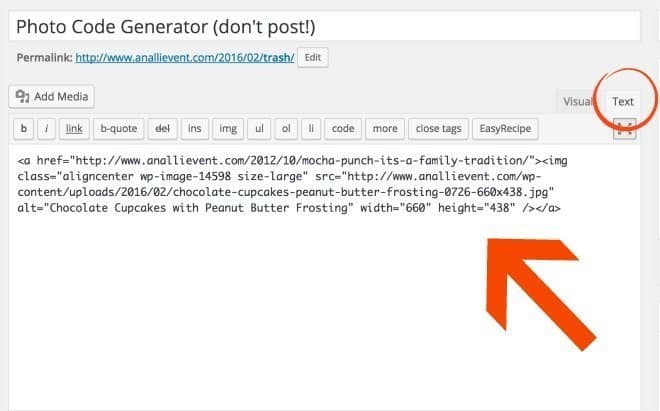
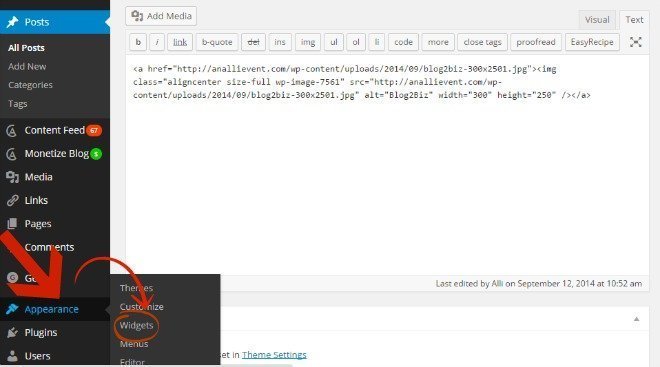
3. Â Save draft and click on text.
There’s your code, baby! Â Copy the code.
4. Â Hover over appearances on your dashboard and click on widgets.
5. Â Paste the text code you copied from your post into a text box on your sidebar.
Don’t forget to save it. Â That’s it! Â Visit your site, refresh your browser and check out the new image in your sidebar. Ta-Da!
Don’t forget to click it! Wasn’t that easy?
 Special Note:  This should work if you’re on Blogger, too!
If you missed the easiest way to install rich pins with no coding required, click here!
36 comments
Such a great & simple tutorial!!!!! Definitely helpful for bloggers new and old! Thanks so much for pulling this together, Alli!
Anytime I find something that works well, I have to share. 🙂
Yep, that is too easy! And I needed that too. I abandoned the process last week and made a mental note to get back on that horse this week. Your posts just made my day. Thanks. Pinned it to my Blogging Board.
Thanks, Shirley! When I discover an easier way to do something pertaining to blogging, especially the tech side of it, I have to share!
Genius. So many things like this… scare me but you’ve made it seem as if my 9 yr old can do it! Thanks… pinning and stumbling
If there’s an easier way to do anything, I’m all over it!
This is a fabulous tutorial for those who are new to blogging. I am not big on the whole coding thing so it’s great that there is a way to have wordpress generate the code for you so you can easily add stuff to the sidebar. Thanks.
I’m sure all the old timers know all of this, but when I realized that I could easily upload pics to my sidebar, I just had to share. 🙂
This is so cool! I wonder if it can be done on Blogger? I doubt it, but I’ve played with the idea of switching to WP for a while, so maybe soon! 🙂
If you have a text editor, it can be done. Try it and let me know.
Awesome! Thank you! This makes it so much more simple. I am going to try your way for the Southern Fall-tastic image.
It has simplified my blogging life, Paris! 🙂
Thanks for a great tutorial Alli! I’m on Blogger so this may not work for me.
Yes, it should, Louida! After saving the photo, click the HTML tab. You should see the code then!
This is so smart!! I cannot believe its that easy! Thank you for this. I am bookmarking for later and pinning!!!
You’re welcome. When I find easy, I can’t keep it to myself! 🙂
Pure Genius! Thank you for this info – I have always been pretty good with Blog DIY but there are certain coding that I just can’t wrap my head around. It’s always those “why didn’t I think of that” moments, but thank goodness there are friends around who point these things out 🙂 Thanks again!
Whoa. I had no idea you could do that! Awesome tip! {pinning and sharing}
~ Ashley
Yep, that’s exactly the way I do it too. However it is better to resize images before uploading, otherwise big images slow down a site. Resizing in media editor does not help for the time an image loads.
I love a straight forward, 1, 2, 3, tutorial. This is exactly what I need to store in my design folder. Great post Alli.
Alli…………….You have got to be kidding me!!!!!!!!!!! This thing is so easy – I always took the hard way out! I think I am going to go add some stuff right now!!!!
Yep, easy peasy! 🙂
Oh my gosh! you’ve got to be kidding me!!!! I just read this with my jaw dropping at how hard I’ve been making it!!!!
Trust me, I feel your pain! I was about to pull my hair out before I realized this!
This is an awesome tutorial,,, and a great idea! 🙂 Pinning to my Blogging Tips board.
~Lorelai
Life With Lorelai
I love using this technique. I don’t know how to put images on my side bar without doing this. My html skills are even less impressive than yours.
Thanks for the great post
I’ve tried to use several codes from watching Youtube videos, but they just never work for me no matter how careful I am to use the right spaces and those dreadful >< open and close things.
So so helpful! Thank you for sharing this!
OMG. This is one of those moments where I think why didn’t I think of that?! That’s genius to enter it into a post and then steal the text and use it in the widget. Isn’t it crazy how sometimes we skip over the simplest things and try to make them difficult?
I know! All this time I was almost pulling my hair out when code would not work the way I wanted it to. 🙂
This is so helpful! This is the same way that I add images in too 🙂 I know how to do the code now that I have copied it so many times but it’s nice to be able to have a shortcut. Also, you can change the a href= to be the link that you have linked under that image, instead of it hyperlinking to your image upload. Hopefully that makes sense!
It’s all geek, I mean, code to me. 🙂 I admire you computer peeps!
OMG you have no idea how helpful this is!!! NO IDEA!!! Thank you!!!
I think this is one of the most vital info for
me. And i am glad reading your article. But want
to remark on some general things, The website style is perfect,
the articles is really great : D. Good job, cheers