
1.3K


I’m beyond excited to have Danielle guest blogging for me today! Danielle lives in Australia and we became blogger friends a while back. She invited me to write a guest post a few months ago on her Glitter Bug Blog and now she’s guest posting for me. You can see the post I wrote for her (Discovering your Body Shape) by clicking here!
Please give Danielle a warm welcome by leaving a comment! Now, on with Danielle’s beach sign tutorial!

Hi everyone! I’m Danielle from Glitter Bug and I’m so excited to be stopping by Alli’s blog to
share this fun tutorial with you all. Alli was a guest poster on my blog a few
months back and I have been so late in getting this post to her – so I just wanted
to quickly apologize to Alli for being so late!!
share this fun tutorial with you all. Alli was a guest poster on my blog a few
months back and I have been so late in getting this post to her – so I just wanted
to quickly apologize to Alli for being so late!!

I live in Australia, in a small beach side town. We moved
here nearly two years ago and into our current house 8 months later. Our house
is a rental so decorating and still sticking to the rules can be tricky.
Luckily these day companies like 3M are making products for renters that make
my life easier.
here nearly two years ago and into our current house 8 months later. Our house
is a rental so decorating and still sticking to the rules can be tricky.
Luckily these day companies like 3M are making products for renters that make
my life easier.

Today I’m sharing a tutorial for my DIY Beach Sign. I made this sign for our bathroom as I’m in the
process of giving it a little facelift, normally I’m not one for the beachy
theme – well only because I live a few blocks away from the beach and I just feel
it’s cheesy to have a beachy house in a beach town, but I made an exception for
our bathroom since the floor tiles are a blueish colour. I knew I wanted a
beach sign and after one failed attempt I finally got a finished product I
love. I think it looks great above the mirror and it’s given me new inspiration
to get the bathroom completed! So let’s make our very own DIY Beach Sign!
You’ll
need:
need:
· Plank
of wood (size is up to you)
of wood (size is up to you)
· Wide
masking tape or contact paper
masking tape or contact paper
· Letter
templates
templates
· 2
colours of paint (I used house paint but use what you have)
colours of paint (I used house paint but use what you have)
· Foam
brush
brush
· Sander
or sandpaper
or sandpaper
· 3M
Command Strips
Command Strips
· Scissors
· Pencil/pen

Step
1:
Start by cutting your wood to size, the length of your piece depends on how
wide your wood is and how far apart you space your letter – give yourself a few
inches to be safe (you can always cut
some off if needed). Now if you have a power saw this step will take you
all of 5 minutes. {However if you only have a hacksaw like us then give yourself
20 minutes to get this done.} Lightly sand the edges to remove any rough bits.

Step
2:
Paint your plank the letter colour. I chose white for my letters so in my case
I paint the top of the plank white first. Allow to dry – apply re-coats as necessary.
2:
Paint your plank the letter colour. I chose white for my letters so in my case
I paint the top of the plank white first. Allow to dry – apply re-coats as necessary.
Step
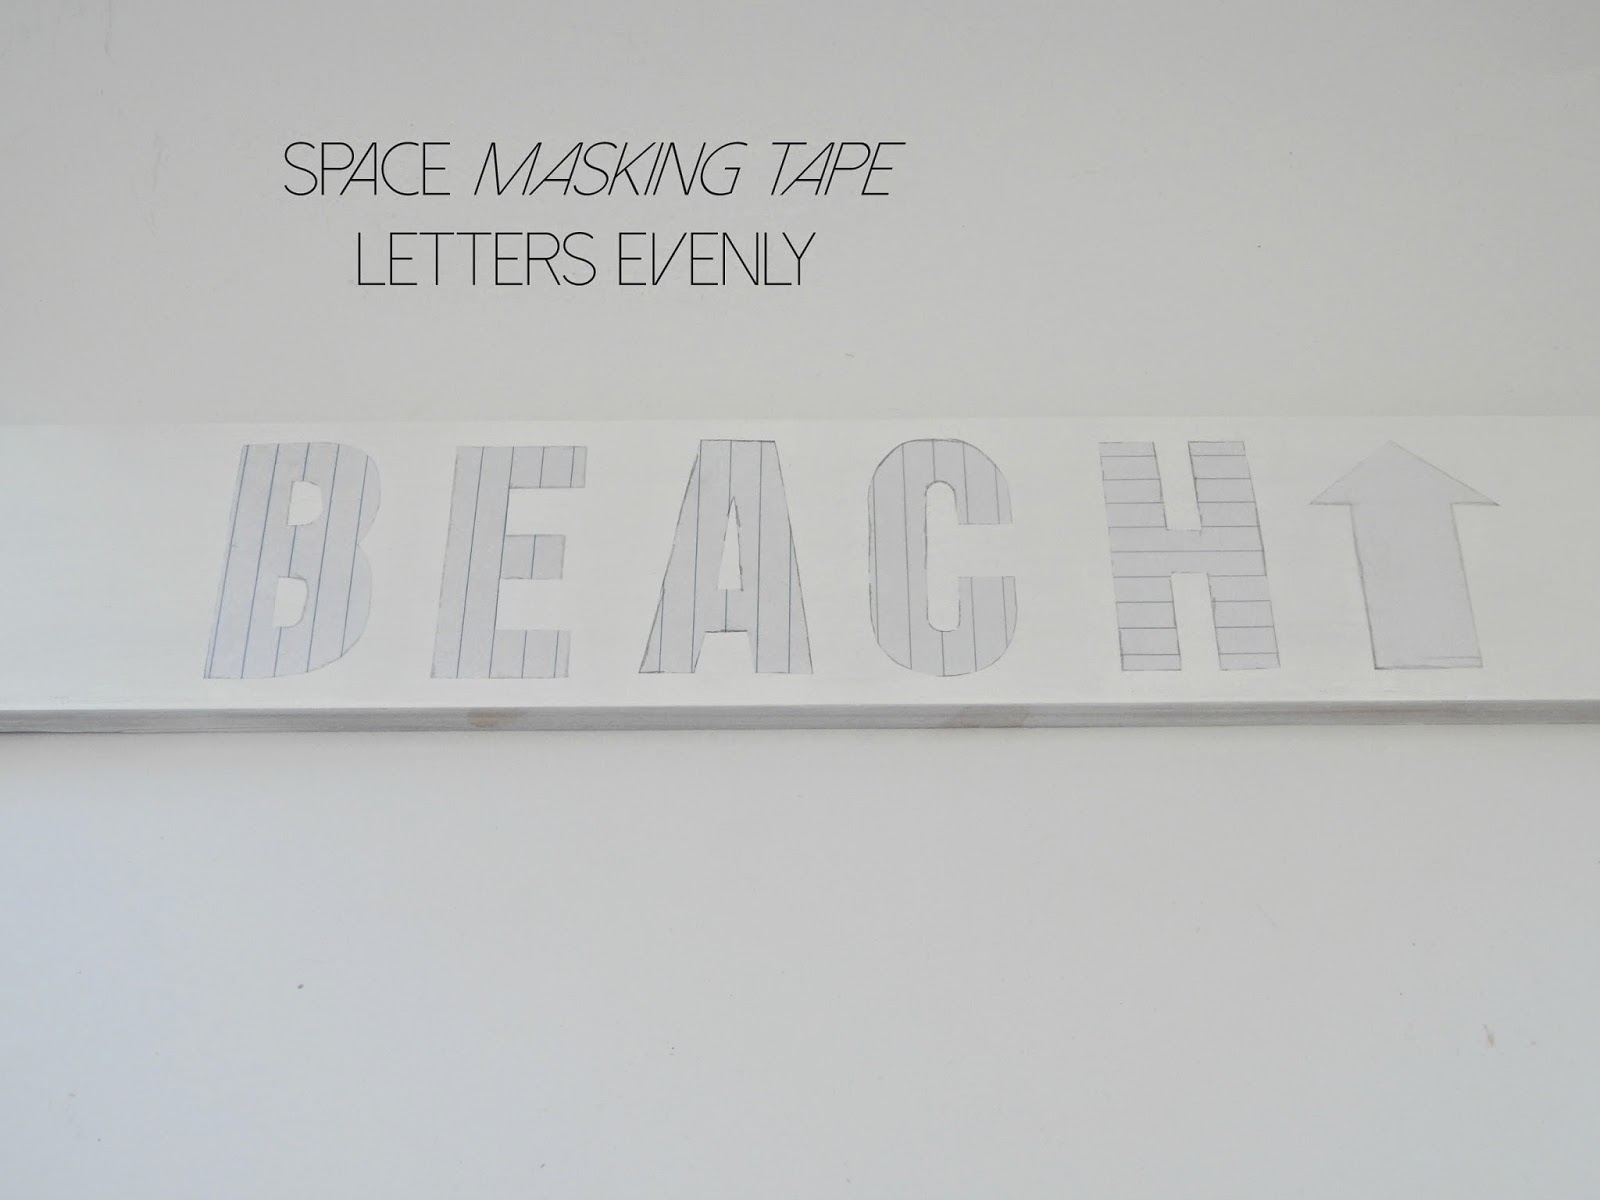
3: Arrange your tape letters on your plank. {I used the font Bebas Neue size
360.} I just traced the letters onto paper from my
computer screen. I then rolled out strips of wide masking tape {or you can use contact paper} Place your letters on top
and trace around. Cut them out & stick them down. I originally
used exercise book paper and spray adhesive (seen in this picture) but it didn’t come off so I re-did
it using this method. Learn from my mistakes! J
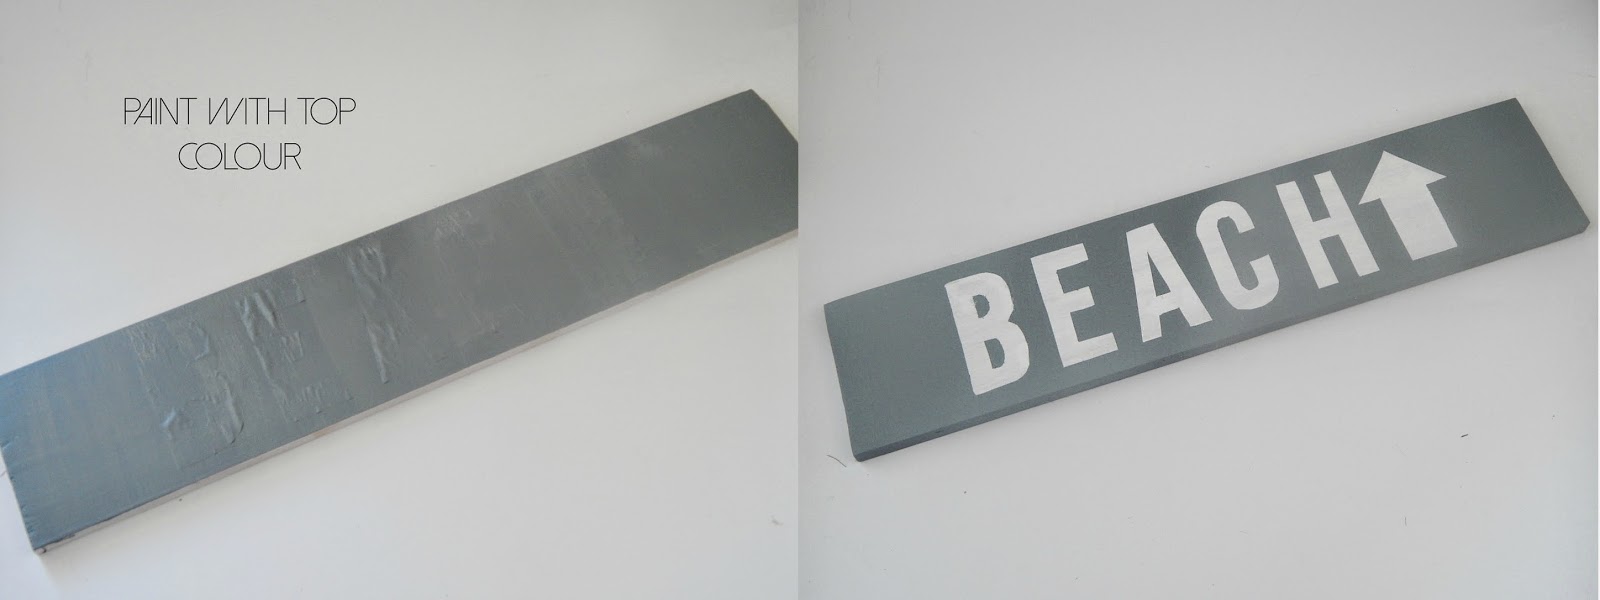
Step 4:
Paint your wood with your top colour. For me I chose a blue grey and mixed in
some white paint to lighten it a bit, paint the sides too! Re-coat as needed, when
you’ve applied the final coat give the wood a few minutes to dry (not too long maybe 5-10 minutes max)
now carefully remove your letters revealing your bottom colour exposed! If your
paint bled a bit, just grab your under colour and a thin paint brush a do a bit
of touch ups on the major spots. Don’t be too pedantic about it.

Step 5:
Sand your sign. This is optional and originally I wasn’t going to do this but
after removing the tape I just felt it was a little too perfect for a beach
sign so I lightly sanded the whole thing until I was happy with it. Attach some
3M command strips to the back and hang in place!
Sand your sign. This is optional and originally I wasn’t going to do this but
after removing the tape I just felt it was a little too perfect for a beach
sign so I lightly sanded the whole thing until I was happy with it. Attach some
3M command strips to the back and hang in place!
Congratulations! You just made yourself your very own Beach Sign!! Yay!! Of course you can use whatever words you like – if
you live in the desert maybe use the word desert, if you live near the
mountains then use that! Adjust it to fit your life and style! There are so
many options with these kind of signs and they can easily be completed in an
afternoon, I will be making a few other variations for around our house so be
sure to check out my blog for more
of these and other great tutorials!
I hope you liked this tutorial and again thank you so
much to Alli, I’ve had great fun doing this project and it was great to stop by
for a visit!! If you’d like feel free to follow me on social media below!!
much to Alli, I’ve had great fun doing this project and it was great to stop by
for a visit!! If you’d like feel free to follow me on social media below!!