
This is a sponsored post for Icon Wall Stickers. All opinions are my own.
A while back we gutted our kitchen/fellowship hall at our church and I redesigned the entire space. It was so much fun picking out new cabinets, stainless steel appliances, and granite countertops for the kitchen. I love decorating and choosing lamps, chairs, wall decor, etc. for the fellowship side.
There is one awkward wall that needs something but just didn’t look right no matter what I did. So it was left relatively unadorned.
Review of Icon Wall Stickers
A couple of weeks ago, I received an email from Icon Wall Stickers asking me to review their product in exchange for a free wall sticker. Well, they had me at free!
I enjoy visiting their online store and going through all their different designs. I almost chose a kid’s room wall sticker for my grandkids, but then I quickly realized that since I could only choose one design, the rest of the kids would be left out. And I’m all about playing fair. And I’m all about giving an honest opinion in this review.
A Wall Sticker For The Awkward Wall At My Church
Then it hit me like a ton of bricks: Pick out something and donate it to the church for that awkward wall space. I have to admit that it was hard to pick out just one. I love every wall sticker Bible verse on the site. Decisions, decisions.
Finally, I did find something I really love.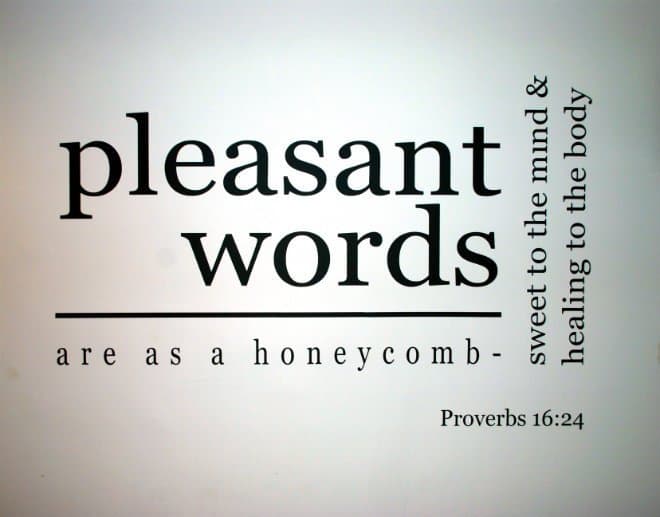
Customize Icon Wall Stickers
It’s so neat that I can customize the wall icon with the color, size, etc. of my choice. I chose the dark gray lettering since the wall is light gray.
The dimensions I chose are 175cm (W) x 116cm (H) (approx. 5’9″ x 3’9″). And it arrived via UPS within just a few days!
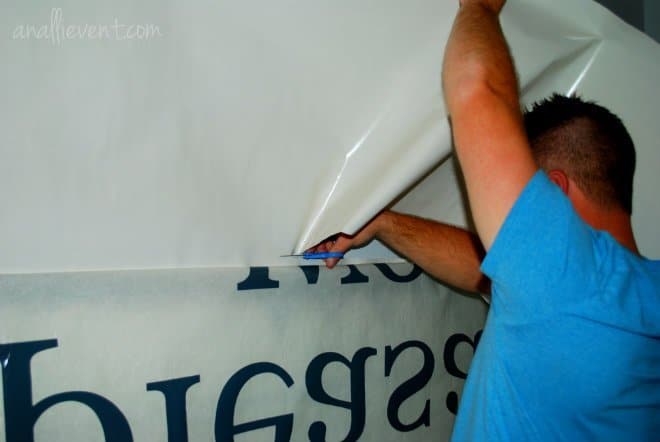
I recruited my son-in-law (as always) to help me because just between you and me, I can never hang anything straight on the wall and I always have to use a level and even then . . . ! I can’t write or cut straight, either. It’s just a quirky problem I have.
Simple Instructions
After reading the simple instructions, we began to apply the wall sticker. The biggest problem we had was finding a roll of tape to position the sticker on the wall. We were all out of painter’s tape and had to resort to whatever we could find. But it all worked out.
It took us about 30 minutes from start to finish (besides looking for that elusive roll of tape).
The wall sticker comes in one large piece.
After positioning the icon exactly as we wanted it, we taped across the front with a long piece of tape, folded the front part (with letters attached) down toward us, and cut away the backing down to the piece of tape.
Then we did the same for the bottom half. The front overlay with the letters was pressed back against the wall (instructions are much easier than me trying to explain it).
We then rubbed out all the bubbles with our debit cards. We removed the overlay carefully to make sure the letters were sticking to the wall and not pulling away.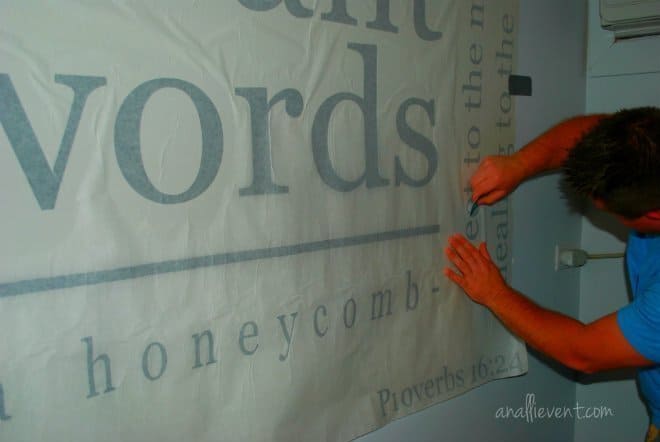
I think it’s the perfect fit for that awkward space.
The icon wall sticker was easy and fun to put up. I would do it again in a heartbeat!
As a matter of fact, my son-in-law asked for the website so he could check it out. You should, too!
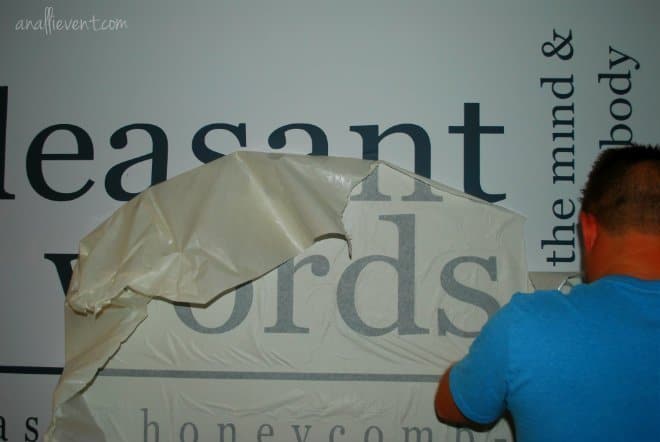
Pulling the overlay off slowly to make sure the letters stick to the wall.
(The above post is sponsored by Icon Wall Stickers)
