
These kid-friendly Christmas crafts are fun for kids and adults!
I’m excited to be participating in thatswhatchesaid.net’s 25 Days of Christmas Series. It’s 25 days of Christmas posts! If you are as crazy about Christmas as I am, you really should go over and check it out.
It will soon be Christmas break for most children. What do you do with the kids if it’s raining or too cold for them to play outside? Have a craft party!
Here are three of my favorite kid-friendly Christmas crafts.
Frosty, Frostina, and Frostette the Snow Family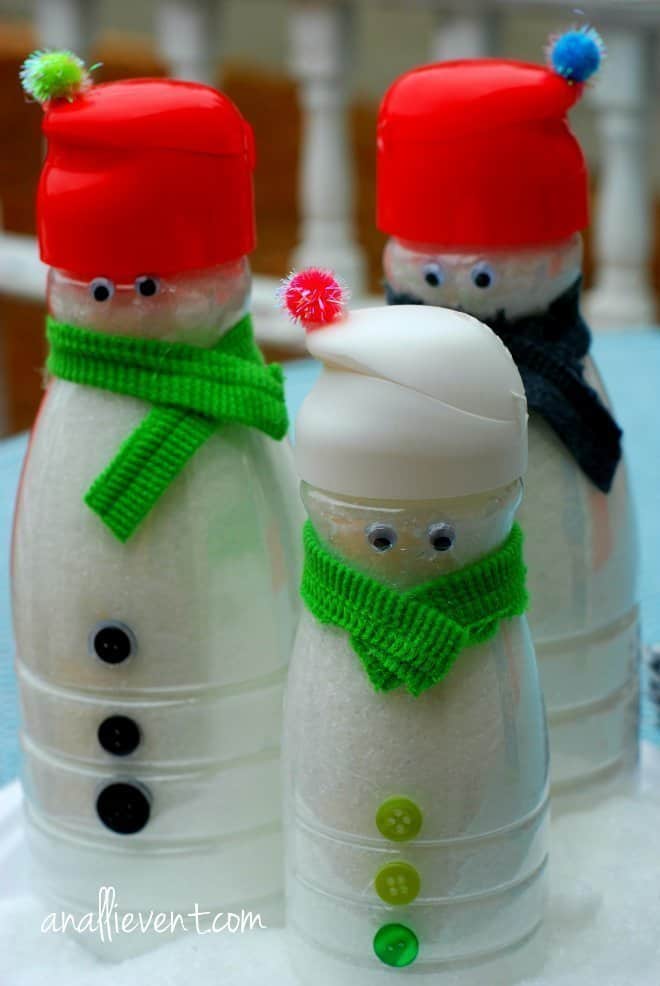
Is this not the cutest (end easy to make) snow family ever?
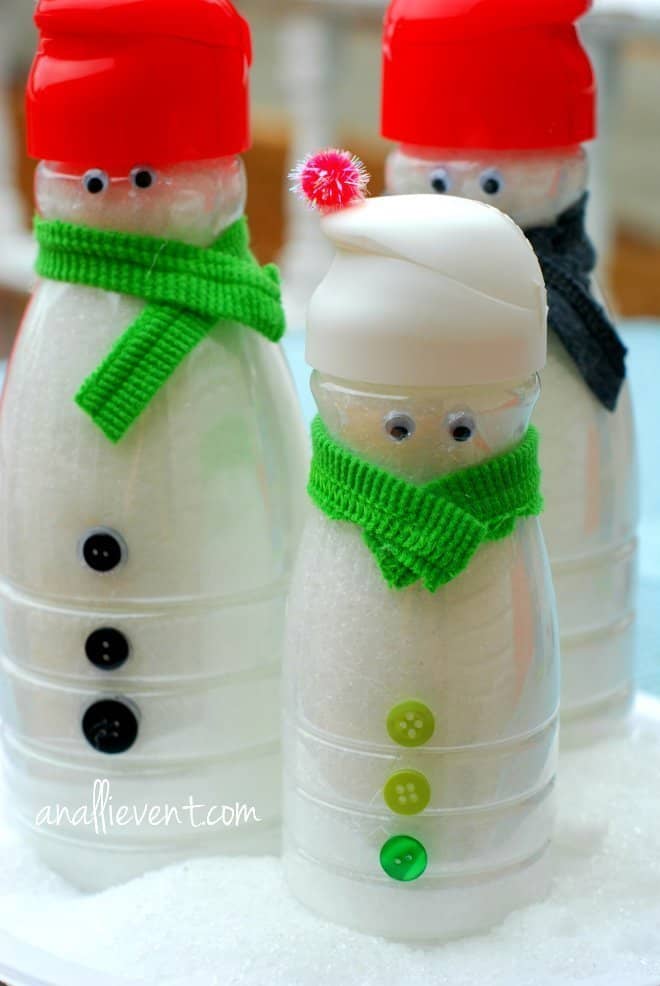
I’m sure you’ve seen a variation of these simple, cute, snowmen on Pinterest. But, I make mine a little different.
I use empty creamer bottles that are clear. Then, I fill them up with my cheapo faux snow and I think my little snow family looks adorable.
Supplies For Creamer Bottle Snowman – Kid Friendly Christmas Crafts
- Empty creamer bottles (2 large and 1 small)
- Epsom salt (my favorite faux snow!)
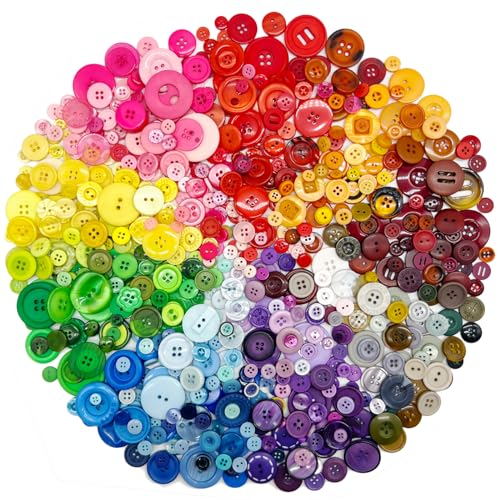
- Buttons (old mismatched are best)
- Wiggly Eyes
- Felt or old sweater material for scarf
- Glue Gun (an adult needs to use this)
- Small Pom Poms
How To Make A Creamer Bottle Snow Family
Peel the label off of the creamer bottles, wash and dry well. Pour Epsom salt into the creamer bottles. Tap the bottom and watch the salt settle.
Add more Epsom salt until it comes all the way to the top. Put the cap on securely.
Using a hot glue gun, add wiggle eyes, buttons, and a scarf. This is a good project to let your child’s imagination run wild.
Creamer Bottle Snow Family
This is the cutest and easiest way to make a snow family. The kids will love making these Christmas crafts.
Materials
- 3 empty creamer bottles (2 large and 1 small)
- Epsom Salt
- Buttons (old mismatched are best)
- Wiggly Eyes
- felt or old sweater material for scarf
- Small Pom Poms
Tools
- Glue Gun
Instructions
- Peel the label off of the creamer bottles. Wash and dry well.
- Fill the creamer bottles with Epsom salt. Tap the bottom so that the salt will settle. Add more until it comes all the way to the top. Put the cap on securely.
- Using a hot glue gun, add wiggle eyes, buttons, and a scarf. Attach the pom-pom to the edge of the creamer cap with the hot glue gun.
Recommended Products
As an Amazon Associate and member of other affiliate programs, I earn from qualifying purchases.
-
 500-700 PCS Assorted Mixed Color Resin Buttons 2 and 4 Holes Round Craft for Sewing DIY Crafts Children's Manual Button Painting,DIY Handmade Ornament
 -
Acerich 1600 Pcs Pompoms Assorted Sizes Multicolor Pom Poms Arts and Crafts Fuzzy Glitter Pompoms for Crafts Balls with 4 Sizes Wiggle Eyes for DIY Creative Crafts Decorations

Here are two more kid-friendly Christmas crafts you will love!
No-Sew Homemade Christmas Ornaments 

These are so cute and easy to make. I’m all about easy when it comes to DIY Christmas Crafts.
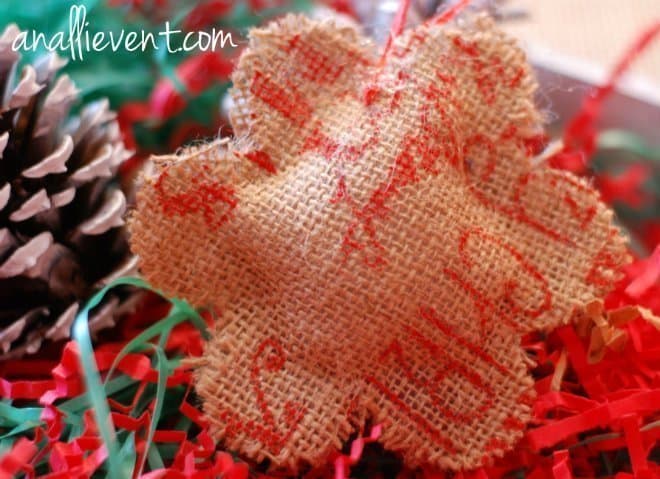
Isn’t the little Christmas tree lovely?
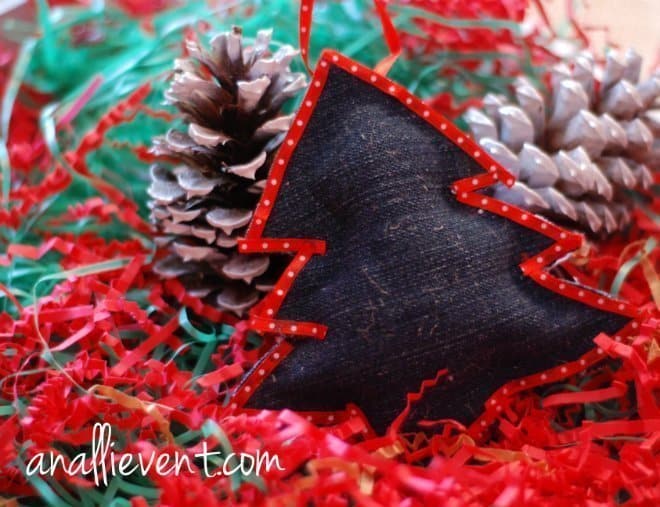
Supplies To Make Christmas Ornaments
- Old denim (or material of your choice) jeans
- Burlap ribbon
- No-sew fabric glue (I use Aleene’s)
- Scissors
- Cookie Cutters (to trace out the pattern)
- Fiberfill
Use a pencil and a snowflake Christmas cookie cutter to trace out two patterns on the wrong side of the burlap ribbon. Using scissors, cut out the two snowflakes. Glue around the outside edge of one of the burlap snowflakes. Leave a small opening for the stuffing. Press the two burlap snowflakes together. Let dry for 10 minutes.
Use the stuffing tool (came in my poly fiberfill) to gently stuff the ornament. Glue the small opening shut.
Glue on a cord or ribbon for hanging. Let dry and you are done.
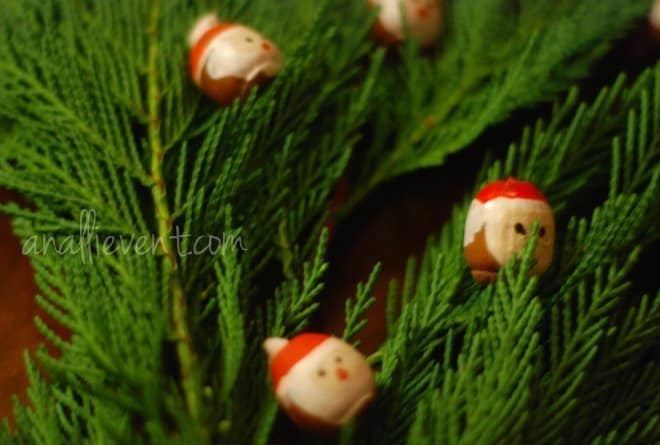
Acorn Santa Ornaments 
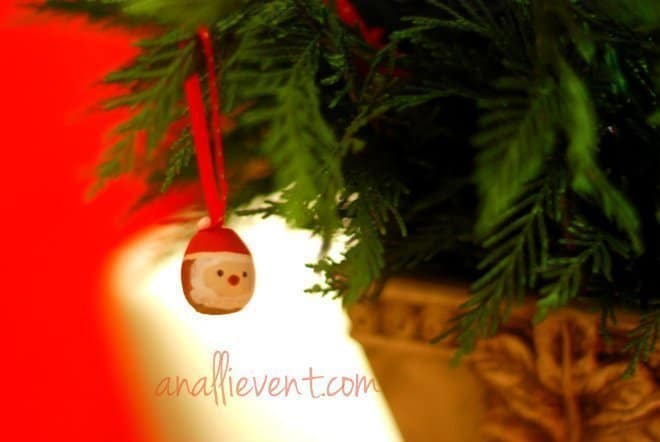
I can’t draw but I can make these cute little Santa acorn ornaments. I think they are adorable.
Supplies To Make Acorn Santa Ornaments
- Large acorns – washed and dried
- Acrylic paints – flesh-colored, red, white, black (or paint pens)
- Small paintbrushes
- Small white pom poms
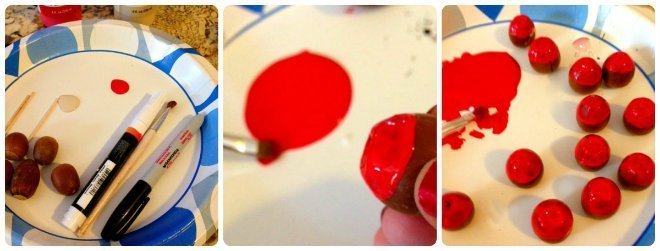
These acorn Santas are so easy to make and simply adorable!
Paint the top third of the acorn red (this is Santa’s hat). Let dry.
Paint a thin white line (fur) beneath the red hat. Let dry.
Use flesh-colored paint to add a U shape under the white line. Let dry.
Use a toothpick dipped in black paint to paint the eyes.
With the white paint, draw a beard around the U-shaped face.
Glue on a white pom and add a ribbon for hanging to the top of the hat. Let dry and hang on the tree.
Do you have a favorite kid-friendly Christmas craft? If so, please share!
You May Also Like
- Dear Santa Letter (free printable)
- Santa And His Reindeer Craft Party For Kids
- DIY Christmas Tree Ornament
- DIY Reindeer Treat Bags
- Toilet Paper Roll Snowmen
- Frosty The Snowman Centerpiece (adorable!)
- Snowman Bookmark Craft